Բաց թողնել հիմնական բովանդակությունը

Ինչպե՞ս արտահանել բոլոր պատկերները միանգամից Excel- ից:

Ենթադրենք, որ ձեր աշխատանքային գրքում շատ նկարներ ունեք և ցանկանում եք դրանք միաժամանակ պահել որոշակի թղթապանակում, սովորաբար, դուք կարող եք ձեռքով պատճենել և տեղադրել նկարները՝ պահպանելու համար, բայց դրանք պատճենելը և տեղադրելը ժամանակատար է։ բազմիցս այսպես. Այստեղ ես ձեզ կներկայացնեմ որոշ խորհուրդներ այս աշխատանքը լուծելու համար:


Արտահանեք բոլոր պատկերները միանգամից Excel- ից ՝ Save As գործառույթով

Ներկառուցված Excel-ով Պահել As գործառույթը, դուք կարող եք պահպանել աշխատանքային գիրքը որպես Web Page բոլոր նկարները, ներառյալ գծապատկերները, ձևերը և այլ առարկաները թղթապանակում պահելու համար: Խնդրում ենք անել հետևյալը.

1. Բացեք աշխատանքային գրքույկը այն նկարներով, որոնք ցանկանում եք պահպանել: Սեղմել Ֆայլ > Պահել As > Դիտել

2. Մեջ Պահել As երկխոսության տուփ, անհրաժեշտ է.

2.1) Ընտրեք թղթապանակ՝ արտահանված պատկերները պահպանելու համար.
2.2) Ընտրեք Web Page Save as type բացվող ցանկից;
2.3) Կտտացրեք այն Փրկել կոճակը:

3. Պատուհանման մեջ Microsoft Excel- ը երկխոսության տուփ, կտտացրեք այո կոճակը:

4. Բացեք այն թղթապանակը, որտեղ պահվում են արտահանված ֆայլերը, և դուք կարող եք տեսնել թղթապանակ և HTML ձևաչափի ֆայլ, որը նշված է ներսում: Աշխատանքային գրքույկի բոլոր նկարները, ներառյալ գծապատկերները, ձևերը կամ առարկաները, պահվում են այս թղթապանակում:

5. Դուք կարող եք ձեզ անհրաժեշտ նկարները պահել թղթապանակում և ջնջել ուրիշներին, որոնք ձեզ պետք չեն


Հեշտությամբ արտահանեք բոլոր պատկերները միանգամից Excel-ից զարմանալի գործիքի միջոցով

Վերոնշյալ մեթոդը կհանի բոլոր օբյեկտները աշխատանքային գրքույկից, միգուցե դրանցից մի քանիսը ձեզ հարկավոր չեն: Եթե ​​դուք ունեք Excel- ի համար նախատեսված գործիքներ տեղադրված է Excel, իր Արտահանել գրաֆիկա գործառույթը կարող է օգնել ձեզ պահպանել միայն ձեզ անհրաժեշտ նկարները:

Տեղադրելուց հետո Excel- ի համար նախատեսված գործիքներխնդրում եմ արեք հետևյալը.

1: սեղմեք Kutools Plus > Ներմուծման արտահանման > Արտահանել գրաֆիկա:

2. Մեջ Արտահանել գրաֆիկա երկխոսության տուփ, խնդրում ենք կազմաձևել հետևյալը.

2.1) Ընտրեք Pictures - ից Տեսակներ բացվող ցուցակ;
Հուշում. Լռելյայնորեն, բոլոր գրաֆիկները, ներառյալ գծապատկերները, նկարները և ձևերը ընթացիկ աշխատանքային գրքում թվարկված են:
2.2) Ի Պահել գրացուցակը բաժին, սեղմեք կոճակ՝ ձեր արտահանված նկարները պահելու համար թղթապանակ ընտրելու համար;
2.3) Ի Արտահանման ձևաչափ բացվող ցուցակ, ընտրեք պատկերի տեսակը, որը ցանկանում եք արտահանել որպես;
2.4) Կտտացրեք OK.

3. Այնուհետև բացվում է երկխոսության տուփ, որը կպատմի, թե քանի նկար է հաջողությամբ արտահանվել, սեղմեք կոճակը OK կոճակը:

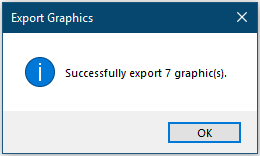
Այժմ կարող եք գնալ նպատակակետ թղթապանակ և ստուգել արտահանված պատկերները:

Խնդրում ենք սեղմել Արտահանել գրաֆիկա ավելին իմանալ այս հատկության մասին:

Նախքան դիմելը Excel- ի համար նախատեսված գործիքներ, խնդրում եմ նախ ներբեռնեք և տեղադրեք այն.


Արտահանեք պատկերները և վերանվանեք դրանք հարակից բջիջների արժեքներով

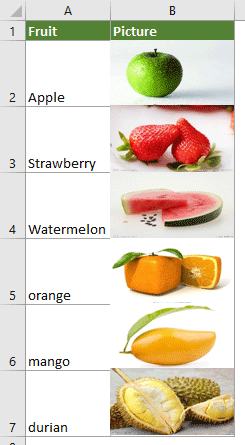
Ինչպես ցույց է տրված ստորև ներկայացված սքրինշոթում, կան երկու սյունակներ, որոնցից մեկը պարունակում է մրգերի անունների ցանկ, իսկ մյուսը պարունակում է մրգերի համապատասխան նկարներ: Այս պատկերները արտահանելու և դրանք ավտոմատ կերպով անվանելու համապատասխան մրգերի անուններով, կարող եք փորձել այս բաժնում VBA կոդը:

1. Աշխատանքային թերթում, որտեղ ցանկանում եք արտահանել նկարները, սեղմեք կոճակը ալտ + F11 բացել ստեղները Microsoft Visual Basic հավելվածների համար պատուհան.

2. Մեջ Microsoft Visual Basic հավելվածների համար պատուհանը, սեղմեք Տեղադրել > Մոդուլ. Եվ հետո պատճենեք հետևյալ VBA-ն Module պատուհանում:

VBA կոդ. Արտահանել նկարները սյունակում և անվանել դրանք ինքնաբերաբար

Sub ExportImages_ExtendOffice()
'Updated by Extendoffice 20220308
    Dim xStrPath As String
    Dim xStrImgName As String
    Dim xImg As Shape
    Dim xObjChar As ChartObject
    Dim xFD As FileDialog
    Set xFD = Application.FileDialog(msoFileDialogFolderPicker)
    xFD.Title = "Please select a folder to save the pictures" & " - ExtendOffice"
    If xFD.Show = -1 Then
       xStrPath = xFD.SelectedItems.Item(1) & "\"
    Else
        Exit Sub
    End If
    
    On Error Resume Next
    For Each xImg In ActiveSheet.Shapes
        If xImg.TopLeftCell.Column = 2 Then
        xStrImgName = xImg.TopLeftCell.Offset(0, -1).Value
        If xStrImgName <> "" Then
            xImg.Select
            
            Selection.Copy
            Set xObjChar = ActiveSheet.ChartObjects.Add(0, 0, xImg.Width, xImg.Height)
            With xObjChar
                .Border.LineStyle = xlLineStyleNone
                .Activate
                ActiveChart.Paste
                .Chart.Export xStrPath & xStrImgName & ".png"
                .Delete
            End With
        End If
        End If
    Next
End Sub

Նշումներ:

1) համարը 2 տողում «Եթե ​​xImg.TopLeftCell.Column = 2 Ապա” ներկայացնում է սյունակի համարը, որտեղից ցանկանում եք արտահանել նկարները.
2) համարը -1 տողում «xStrImgName = xImg.TopLeftCell.Offset(0, -1).Արժեք” ցույց է տալիս, որ նկարները կանվանակոչեք հարակից ձախ բջիջների արժեքներով:

3. Սեղմեք F5 կոդը գործարկելու բանալին: Բացվող պատուհանում ընտրեք թղթապանակ՝ նկարները պահելու համար և սեղմեք OK.

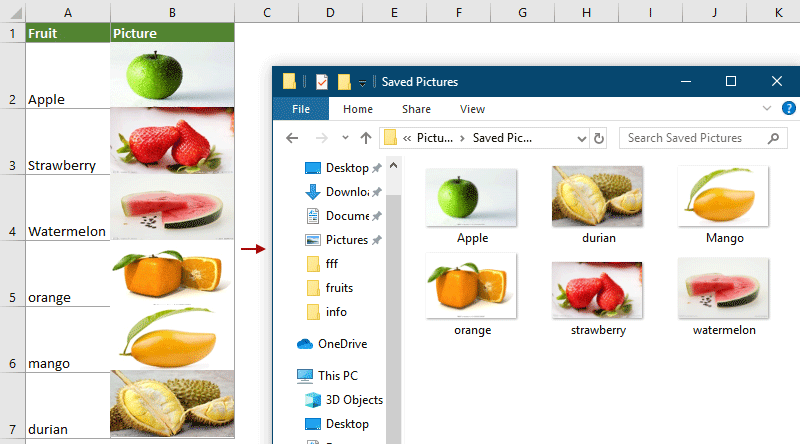
Այնուհետև նշված սյունակի բոլոր նկարները արտահանվում են և ավտոմատ կերպով անվանվում հարակից բջիջների արժեքներով, ինչպես դուք նշել եք:


Առնչվող հոդված:

Ինչպե՞ս արտահանել գծապատկերները գրաֆիկայի մեջ Excel- ում:

Գրասենյակի արտադրողականության լավագույն գործիքները

🤖 Kutools AI օգնականՀեղափոխություն կատարել տվյալների վերլուծության հիման վրա՝ Խելացի կատարում   |  Ստեղծեք ծածկագիր  |  Ստեղծեք հատուկ բանաձևեր  |  Վերլուծել տվյալները և ստեղծել գծապատկերներ  |  Invoke Kutools-ի գործառույթները...
Հանրաճանաչ հատկություններ: Գտեք, ընդգծեք կամ նույնականացրեք կրկնօրինակները   |  Deleteնջել դատարկ շարքերը   |  Միավորել սյունակները կամ բջիջները՝ առանց տվյալների կորստի   |   Կլոր առանց բանաձևի ...
Super Փնտրել: Բազմաթիվ չափանիշների VLookup    Բազմակի արժեք VLookup  |   VLookup բազմաթիվ թերթերում   |   Fuzzy Փնտրել ....
Ընդլայնված բացվող ցուցակ: Արագ ստեղծեք բացվող ցուցակը   |  Կախված բացվող ցուցակ   |  Բազմակի ընտրություն Drop Down ցուցակ ....
Սյունակի կառավարիչ: Ավելացրեք որոշակի քանակությամբ սյունակներ  |  Տեղափոխել սյունակները  |  Փոխարկել թաքնված սյունակների տեսանելիության կարգավիճակը  |  Համեմատեք միջակայքերը և սյունակները ...
Առանձնահատկություններ: Ցանցի կենտրոնացում   |  Դիզայնի տեսք   |   Մեծ Formula Bar    Աշխատանքային գրքույկի և թերթիկների կառավարիչ   |  Ռեսուրսների գրադարան (Ավտոմատ տեքստ)   |  Ամսաթիվ ընտրող   |  Միավորել աշխատանքային թերթերը   |  Գաղտնագրել/գաղտնազերծել բջիջները    Ուղարկեք նամակներ ըստ ցանկի   |  Սուպեր զտիչ   |   Հատուկ զտիչ (զտել թավ/շեղ/շեղված...) ...
Լավագույն 15 գործիքների հավաքածու12 Տեքստ Գործիքներ (Ավելացրեք տեքստ, Հեռացնել նիշերը, ...)   |   50+ Աղյուսակ Տեսակներ (Գանտի աղյուսակը, ...)   |   40+ Գործնական Բանաձեւեր (Հաշվարկել տարիքը ՝ ելնելով ծննդյան տարեդարձից, ...)   |   19 միացում Գործիքներ (Տեղադրեք QR կոդ, Տեղադրեք նկար ուղուց, ...)   |   12 Փոխարկում Գործիքներ (Բառեր համարներ, Արտարժույթի փոխակերպումը, ...)   |   7 Միաձուլում և պառակտում Գործիքներ (Ընդլայնված կոմբինատ տողեր, Պառակտված բջիջներ, ...)   |   ... եւ ավելին

Լրացրեք ձեր Excel-ի հմտությունները Kutools-ի հետ Excel-ի համար և փորձեք արդյունավետությունը, ինչպես երբեք: Kutools-ը Excel-ի համար առաջարկում է ավելի քան 300 առաջադեմ առանձնահատկություններ՝ արտադրողականությունը բարձրացնելու և ժամանակ խնայելու համար:  Սեղմեք այստեղ՝ Ձեզ ամենաշատ անհրաժեշտ հատկանիշը ստանալու համար...

Նկարագրություն


Office Tab- ը Tabbed ինտերֆեյսը բերում է Office, և ձեր աշխատանքը շատ ավելի դյուրին դարձրեք

  • Միացնել ներդիրներով խմբագրումը և ընթերցումը Word, Excel, PowerPoint- ով, Հրատարակիչ, Access, Visio և Project:
  • Բացեք և ստեղծեք բազմաթիվ փաստաթղթեր նույն պատուհանի նոր ներդիրներում, այլ ոչ թե նոր պատուհաններում:
  • Բարձրացնում է ձեր արտադրողականությունը 50%-ով և նվազեցնում մկնիկի հարյուրավոր սեղմումները ձեզ համար ամեն օր:
Comments (24)
Rated 5 out of 5 · 1 ratings
This comment was minimized by the moderator on the site
WaW Amazing ! Thanks a lot ! It works perfect for me !
I couldn't insert Milan's code inside the first one, so maybe you could update with the two codes combined ?
It is because my pictures are so small...
Rated 5 out of 5
This comment was minimized by the moderator on the site
Thank you! The code does the job. The only downside is it exports images in displayed size, not in original size. And it's often the case, when an otherwise large image is scaled down to fit in the cell. Is there a way to tweak this code to export original size images?

Sub ExportImages_ExtendOffice()
'Updated by Extendoffice 20220308
    Dim xStrPath As String
    Dim xStrImgName As String
    Dim xImg As Shape
    Dim xObjChar As ChartObject
    Dim xFD As FileDialog
    Set xFD = Application.FileDialog(msoFileDialogFolderPicker)
    xFD.Title = "Please select a folder to save the pictures" & " - ExtendOffice"
    If xFD.Show = -1 Then
       xStrPath = xFD.SelectedItems.Item(1) & "\"
    Else
        Exit Sub
    End If
    
    On Error Resume Next
    For Each xImg In ActiveSheet.Shapes
        If xImg.TopLeftCell.Column = 2 Then
        xStrImgName = xImg.TopLeftCell.Offset(0, -1).Value
        If xStrImgName <> "" Then
            xImg.Select
            
            Selection.Copy
            Set xObjChar = ActiveSheet.ChartObjects.Add(0, 0, xImg.Width, xImg.Height)
            With xObjChar
                .Border.LineStyle = xlLineStyleNone
                .Activate
                ActiveChart.Paste
                .Chart.Export xStrPath & xStrImgName & ".png"
                .Delete
            End With
        End If
        End If
    Next
End Sub
This comment was minimized by the moderator on the site
same issue...
just a quick edit:
If xStrImgName <> "" Then
            xImg.Select
          [b]  xImg.ScaleHeight 1#, True, msoScaleFromTopLeft
            xImg.ScaleWidth 1#, True, msoScaleFromTopLeft[/b]


this will resize all images, so you have to close the file afterwards without saving to preserve the initial vie, but the pictures will go out in their original size.
This comment was minimized by the moderator on the site
fixed, thank you anyway:

Sub ExportImages_ExtendOffice()
'Updated by Extendoffice 20220308
    Dim xStrPath As String
    Dim xStrImgName As String
    Dim xImg As Shape
    Dim xObjChar As ChartObject
    Dim xFD As FileDialog
    Set xFD = Application.FileDialog(msoFileDialogFolderPicker)
    xFD.Title = "Please select a folder to save the pictures" & " - ExtendOffice"
    If xFD.Show = -1 Then
       xStrPath = xFD.SelectedItems.Item(1) & "\"
    Else
        Exit Sub
    End If
    
    On Error Resume Next
    For Each xImg In ActiveSheet.Shapes
        If xImg.TopLeftCell.Column = 2 Then
        xStrImgName = xImg.TopLeftCell.Offset(0, -1).Value
        If xStrImgName <> "" Then
            xImg.Select
'            Selection.Copy
            Selection.CopyPicture Appearance:=xlScreen, Format:=xlPicture
            Set xObjChar = ActiveSheet.ChartObjects.Add(0, 0, xImg.Width, xImg.Height)
            With xObjChar
                .Parent.ShapeRange.Line.Visible = msoFalse
                .Border.LineStyle = xlLineStyleNone
'                .Activate
                .Select
                ActiveChart.Paste
                .Chart.Export xStrPath & xStrImgName & ".png"
                .Delete
            End With
        End If
        End If
    Next
End Sub
This comment was minimized by the moderator on the site
Thank you for this great tool, It saved me a ton of time. But I've ran into an issue that most of the photos are saved as blank photos as shown in the attached screenshot. Appreciate the help. Thank you
This comment was minimized by the moderator on the site
Hello, Mohamed
Did your problem occur when using Kutools for Excel? If so, could you upload your workbook file here if you don't mind?
So that, we can check where the problem is?
Thank you!
This comment was minimized by the moderator on the site
I am using the code given in the " Export images and rename them with the adjacent cell values" part of the article. When I run this code I get the following error: "Run-time error '91': Object variable or With block variable not set."

When I click "debug" it points me to line 9 of the code :
xFD.Title = "Please select a folder to save the pictures" & " - ExtendOffice"

Do you have a solution to this? Your article is the only solution I can find.

I am using Excel for Mac.
This comment was minimized by the moderator on the site
Hello, Dylan,

Sorry, our code is only applicable to Microsoft Excel, maybe you can try the code in Microsoft Excel.
Thank you!
This comment was minimized by the moderator on the site
I am using Microsoft Excel on Mac OSX.
This comment was minimized by the moderator on the site
I am also getting this issue using a Mac - Dylan were you able to resolve?

Are we meant to change something with the below that it is picking up as a bug?

xFD.Title = "Please select a folder to save the pictures" & " - ExtendOffice"
This comment was minimized by the moderator on the site
Hello, thank you for this article. When I execute the code above from Export images and rename them with the adjacent cell values, I get the following error message: Run-time error '91': Object variable or With block variable not set. When I click debug, it highlights line 9 of the code. Do you know why this is happening? FYI I am using Excel for Mac OSX. Thank you
This comment was minimized by the moderator on the site
Τέλειο εργαλείο! Όμως το μέγεθος-ανάλυση της εικόνας μικραίνει . Υπάρχει τρόπος να διατηρηθεί η αρχική ανάλυση ?
This comment was minimized by the moderator on the site
Bonjour le code VBA m'enregistre des images blanches je ne comprends pas pourquoi. quelqu'un a une solution ?
This comment was minimized by the moderator on the site
Hello, Sophie,
The code in this article can work well in my Excel, could you upload your Excel file here if you don't mind? So we can help to check the problem for you.
Or you can describe your problem more clear and detailed.
Thank you!
This comment was minimized by the moderator on the site
hallo skyyang, ich habe seit neulich das gleiche problem, viele leere *.png dateien.
Your text to link
bei jedem exportversuch werden andere bilder nicht richtig erfasst.
mfg und danke
This comment was minimized by the moderator on the site
Hello, milan bojic
Which Excel version do you use?
I have tried the code in your workbook, it works well, and all the images in your workbook are exported in the folder and renamed based on the cell value, see screenshot:
https://www.extendoffice.com/images/stories/comments/comment-skyyang/doc-export-images-1.png
This comment was minimized by the moderator on the site
Hello skyyang, it's office 365. your code was working fine until 2 weeks ago, not anymore, see screenshot. meanwhile i found something similar that works, (combined with yours), maybe you can use that for your code.

screenshot:
[img]https://drive.google.com/file/d/1vfRlhpyzqg7QNFeYl53mTvNON3gIrFwv/view?usp=sharing[/img]


Sub BilderExportieren()
    Dim shaBild As Shape
    Dim strZielpfad As String
    strZielpfad = "c:\Tuerliste\img3\" '<== Zielpfad entsprechend anpassen!!
    For Each shaBild In ActiveSheet.Shapes
        BildExportShape shaBild, strZielpfad
    Next shaBild
End Sub

Sub BildExportShape(shaBild As Shape, strZiel As String)
    Dim xStrImgName As String
    Dim chDiagramm As ChartObject
    xStrImgName = shaBild.TopLeftCell.Offset(0, -1).Value
    Application.ScreenUpdating = False
    shaBild.CopyPicture Appearance:=xlScreen, Format:=xlPicture
    Set chDiagramm = ActiveSheet.ChartObjects.Add(0, 0, shaBild.Width, shaBild.Height)
    With chDiagramm.Chart
        ' erforderlich bei Excel2010, da Diagrammfläche automatisch mit Rahmen erstellt wird
        .Parent.ShapeRange.Line.Visible = msoFalse
        ' bei Excel2016 muss die Diagrammfläche selektiert vor .Paste werden - andernfalls ist das Bild leer
        If Val(Application.Version) = 16 Then .ChartArea.Select
        .Paste
        .Export Filename:=strZiel & xStrImgName & ".png", FilterName:="png"
    End With
    chDiagramm.Delete
    Set chDiagramm = Nothing
    Set shaBild = Nothing
    Application.ScreenUpdating = True
End Sub


Thank you anyway
Milan Bojic
This comment was minimized by the moderator on the site
Hello, milan bojic,
Thanks for your code, maybe it can help others in the future. 🙂
This comment was minimized by the moderator on the site
This is great, if I wanted to grab the background colour of a cell (instead of an image) and save that as a image named with the adjacent cell how would that be an easy change to the code?
This comment was minimized by the moderator on the site
Hi Tom,Do you mean saving the background color of the cell as an image and named it with the adjacent cell value?Sorry can't help you with that.
This comment was minimized by the moderator on the site
thanks a lot it helped me a lot
There are no comments posted here yet
Load More
Please leave your comments in English
Posting as Guest
×
Rate this post:
0   Characters
Suggested Locations